Marmalade Bites

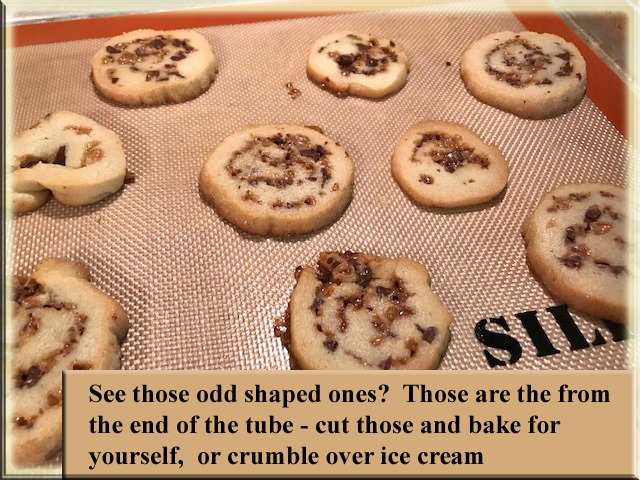
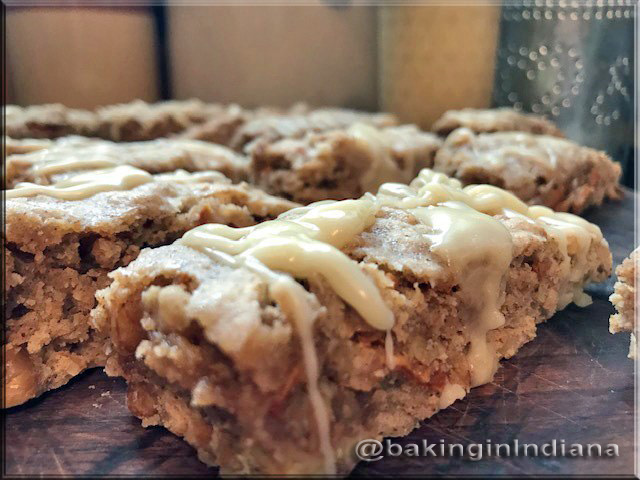
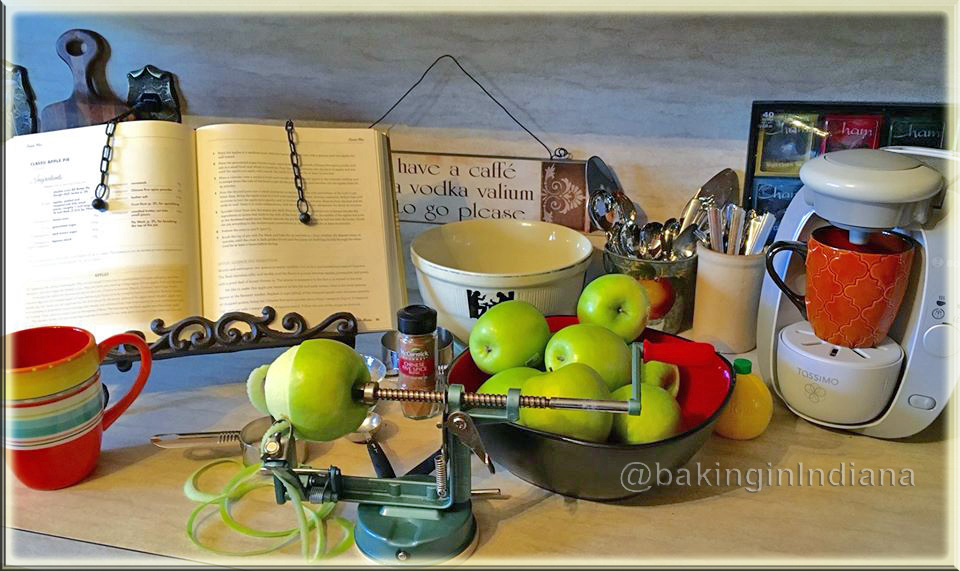
This recipe is from a newspaper clipping I found in an old cookbook I inherited from my late mother in law. She put a small note saying these were from the early 1900’s. The paper clipping was worn and brittle so while copying it to save it, I decided to try these. This called for orange marmalade, which I used, but I think you can use any flavor based on the taste of these cookies. When you first smell and taste these, you are reminded of a meringue cookie. The cookies are very soft and delicate, and are more cake like. These were delicious hot out of the oven,and the next day after sitting in a covered container. The smell is amazing. This recipe makes a lot, so I froze some of the cookie dough by dropping spoonfuls on to a dish, flash freezing and then dropping the little nuggets into a Ziploc freezer bag. I used a 1/2″ cookie scoop and a 1″ cookies scoop; I preferred the size, and taste of the 1/2″ scoop. The 1/2″ scoop can get you about 50 of these cookies. These are very soft coming out of the oven; you definitely want to either use foil on the cookie pan with shiny side up, and spray with oil; or use a silicone liner, because they will stick if you don’t – think honey like cookies. Note: Keep the dough in refrigerator at all times – it really does help
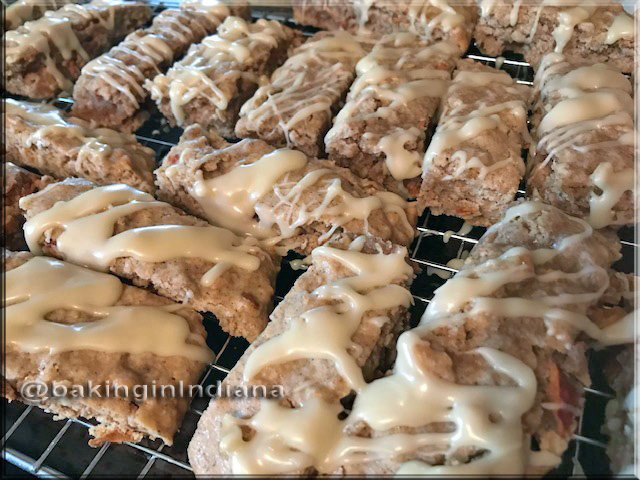
Marmalade Bites

3 cups cake flour

1/2 teaspoon salt

1/2 teaspoon baking soda

1/2 cup butter

1 cup sugar

2 eggs, beaten

1 teaspoon vanilla

3/4 cup marmalade

Preheat the oven to 350. Cover baking sheet with foil, shiny side up. Coat the foil with vegetable spray or use a silicon liner. Sift flour, salt and baking soda Cream butter and sugar in the bowl of a standing mixer fitted with paddle attachment. Add eggs and vanilla. Add sifted dry ingredients and combine. Add marmalade.

Let dough rest 5 to 10 minutes in the refrigerator. (this step is important, the dough is very soft and sticky – you must let it sit in refrigerator between baking batches) Drop dough by teaspoons on baking sheet. These do spread.

Bake 15 minutes (the recipe called for turning them after 7 minutes but these were way too soft; I tried that with the first batch and they tore apart while trying to scoop them up due to how soft and sticky they were, so I let them bake as is for the entire 15 minutes until light brown). Place baking sheet on a rack and let cook for a few minutes. Transfer to cookie rack to cool completely.

These are very soft as you lift and place on racks; these cookies will become firmer as they cool. Store between sheets of wax paper in a covered container.

I always consider the recipe a win if Jim does not suggest an alternate idea for next time. He said these are delicious and he ate quite a few. They are very rich.

Toffee Chocolate Pinwheels

Toffee Chocolate Pinwheels

½ cup butter, softened

¾ cup sugar

1 large egg

1 tsp rum extract

1 ½ cups all-purpose flour

¼ tsp baking powder

¼ tsp salt

½ cup crushed toffee bits

¼ cup semisweet chocolate chips, miniature or chopped

In a large bowl, cream butter and sugar until light and fluffy. Beat in egg and rum extract. In another bowl, whisk flour, baking powder, and salt; gradually beat into the creamed mixture. Shape dough into a disk; wrap in plastic. Refrigerate 1 hour or until firm enough to roll.

On a sheet of waxed paper, roll dough into a 10-inch square. In a small bowl, combine toffee bit and chocolate chips; sprinkle over dough to within 1 inch of edges. Using waxed paper, tightly roll dough jelly-roll style, removing the paper as you roll. Wrap in waxed paper and/or plastic; put in tube for shaping; refrigerate until firm enough to slice (I leave in fridge overnight.

Preheat oven to 375. Unwrap dough and cut crosswise into ¼ inch slices. You need to experiment here with width. Too thin – they bake quickly are very crispy when they cool down, like a chip. I decided I preferred them thicker. The thicker ones barely brown and they are done – they look like a touch of brown on the edges. Place slices 2-inches apart on a paper-lined baking sheet. I used my silicone mat. Bake for 8-10 minutes or until the edges are brown but watch and write down your time. Cool on pan for 2 minutes and then transfer to wire rack to cool completely.

This dough freezes well. I wrapped it in waxed paper, and then plastic.

sprinkle the filling to the edge
looks like this as you pull the paper back – fold the paper for easy grasping
smooth over the paper dough log each time you roll
preparing for the fridge for overnight
the next day; slicing the log
this is the thickness I prefer
eat the ugly ends -tastes the same 
🙂 
inside of the pinwheel

Black Walnut Apple Cake

Black Walnut Apple Cake

Cake:

2 cups sugar

1 cup vegetable oil

3 large eggs

1 teaspoon salt

1 teaspoon baking soda

3 cups all-purpose flour

2 teaspoons vanilla extract

3 cups granny smith apples, peeled and diced

2 ½ cups chopped black walnuts (divided)

(Optional: I thought rum would be good in this, so I added a couple Tablespoons)


Brown sugar glaze: (see my tip at bottom of recipe)

2 cup brown sugar, packed

½ cup butter

2/3 cup evaporated milk

(Optional: I added 2 Tablespoons of rum, after I removed the glaze from the heat, just because)

Pay close attention to dividing of walnuts in instructions.

Preheat oven to 325 degrees. Grease desired cake pans(s). In a large bowl, combine sugar, oil, eggs and salt. Beat at medium speed until well blended. Add baking soda and beat 2 minutes. Gradually add flour and beat until combined. Stir in vanilla, apples, and one cup walnuts. Bake at 325 degrees for 45-50 minutes (for two layers) or 50-60 minutes for 9 x 13 or Bundt) I used a 9 x 13 and baked for 55 minutes – watch and judge your cake (remember I put rum in so I baked for longer due to extra liquid) Cool for 10 minutes then remove from pan. Let cool one hour as you prepare the glaze.

Tip: Chop one cup of walnuts and put it with the recipe ingredients when you sit everything out ahead of time.

Glaze Tip: I made the glaze while cake was in oven because it must sit in the refrigerator for 1 hour.

For the glaze, combine sugar and butter in small saucepan over medium heat stirring until butter is melted and sugar is dissolved. Stir in evaporated milk and bring to boil, stirring for 2 to 3 minutes or until thicken. Remove from heat (this is when I added the rum) and chill for one hour. Spread brown sugar glaze over cake. Sprinkle and press remaining black walnuts into top and sides of cake.

This was delicious the next day for breakfast.

Cinnamon Chip Chai-Spiced Snickerdoodles

Cinnamon Chip Chai-Spiced Snickerdoodles

These freeze well – I remember the first time I made these, Jim took a bite and said, “This is InSANE how good these are!” 🙂 Keeper!

½ cup sugar

2 tsp ground cardamom

2 tsp ground cinnamon

½ tsp ground ginger

½ tsp ground cloves

¼ tsp ground nutmeg

Dough: ½ cup butter, softened

½ cup shortening

1 cup sugar

2 large eggs

1 tsp vanilla extract

2 ¼ cups all-purpose flour

2 tsp cream of tartar

1 tsp baking soda

Dash salt

1 pkg (10 oz) cinnamon baking chips

Preheat oven to 350. For spiced sugar, mix first six ingredients In a large bowl, cream butter, shortening, sugar and 2 Tbsp spiced sugar until light and fluffy. Beat in the eggs and vanilla extract. In another bowl, whisk together flour, cream of tartar, baking soda and salt, gradually beat into creamed mixture. Stir in baking chips.

Refrigerate, covered, until firm enough to shape, about 1 hour. Shape the dough into 1-in. balls, roll in remaining spiced sugar. Place 2 in. apart on greased baking sheets. (I use the baking mats, so I skip the greased baking sheet step) Bake until set, 11-13 minutes. Remove from pans to wire racks to cool.

Makes about 6 dozen

Tip: The recipe starts out saying to preheat the oven but since you need to put the dough in the fridge for about an hour – I did not preheat until it was close to time to take the dough out of the fridge. I continued to refrigerate the dough between each pan that I filled. These were true to the baking time shared in the recipe.

You can probably use any type of chip, and this recipe will be good, but I really believe the cinnamon chips took them to the chai level quickly

I buy cinnamon chips at Meijers here in Indiana

Glazed Maple Shortbread Cookies

Uh Oh…….These are so delicious…………


Glazed Maple Shortbread Cookies


1 cup butter, softened

¼ cup sugar

3 Tbsp cornstarch

1 tsp maple flavoring

1 ¾ cups all-purpose flour

GLAZE:

¾ cup plus 1 Tbsp confectioners’ sugar

1/3 cup maple syrup


In a large bowl, beat butter, sugar and cornstarch until blended. Beat in flavoring. Gradually beat in flour.Shape dough into a disk; wrap in plastic wrap. Refrigerate 45 minutes or until firm enough to roll.


Preheat oven to 325. On a lightly floured surface, roll dough to ¼-in. thickness. Cut with a floured 2 ¾ -in. leaf-shaped cookie cutter. Place 1 in. apart o parchment paper-lined baking sheets.


Bake 20-25 minutes or until edges are light brown. Remove from pans to wire racks to cool completely.


In a small bowl, mix confectioners’ sugar and maple syrup until smooth. Spread over cookies. Let stand until set.I used recommended size for leaf cookie cutter, and this made 25 cookies. The amount will depend on the size of your cutter.


Tip: You want to wait until these are cooled before dipping in glaze as the points will break if you don’t. These are addictive after the first bite.these are a bit browner but you can’t tell in the photo

Cinnamon Hazelnut Biscotti

Cinnamon Hazelnut Biscotti and Pumpkin Spice coffee – I make this combo to give as a gift when a lady friend needs a pick me up – I buy cups and saucers (matching) at yard sales throughout the year and save them for gifting with these treats – the biscotti is perfect for dipping in the hot drink.

The photo is mine; the recipe was given to me by a college friend, 30 years ago.

I like to scrapbook my recipes that I make over and over. I laminate the pages or put in sleeves. I do not have this typed up as I just pull this sleeve out, and stand on my book stand when creating from it.

Apple Maple Walnut Biscotti

Apple Maple Walnut Biscotti

(crunchy on the outside and soft on the inside)

2 eggs

2/3 cup sugar

1/3 cup butter, melted

2/3 cup maple syrup

2 1/2 cups flour

1/2 Tbsp cinnamon

1/2 tsp nutmeg

2 tsp baking powder

1/2 tsp salt

2 cups chopped walnuts

1 cup dried apples

Preheat oven to 325 F Coat a cookie sheet with non-stick spray or use cookie liner.

In a mixing bowl, vigorously beat together the eggs, sugar, melted butter, and maple syrup. Sift in the flour, cinnamon, nutmeg, baking powder, and salt. Mix well. Fold in the walnuts and dried apples.

Form the dough into a uniform cylinder the width of the cookie sheet. Flatten to 1 inch in height. Bake in the 325 F oven for 25 minutes. Remove from the oven, and let cool for about 10 minutes.

Reduce the oven temperature to 300 F.

Using a serrated knife, slice into 1/2-inch pieces. Bake the biscotti in the 300 F oven for 6 minutes on one side, then turn the biscotti over, and bake for 6 minutes on the other side.Makes about 24 or more biscotti based on how big you cut them

These are good on their own, and I decided to make a maple glaze to add to half of them. I like to add this glaze to Vermont Maple cookies. The jar in one of the photos shows how much is left from the recipe I will share. I store it in the fridge and use it on breads, rolls, cookies, muffins, etc.

Maple Glaze

1/2 cup butter, cubed

1 3/4 cups confectioners’ sugar

1/3 cup maple syrup

1/4 tsp maple flavoring

In a saucepan, melt butter over medium heat. Remove from heat. Gradually beat in the confectioners’ sugar, maple syrup and maple flavoring until smooth.

Drizzle over cookies, let dry completely. Store between pieces of waxed paper in airtight containers.

I use this glaze on Vermont Maple Cookies, Pumpkin chocolate chip cookies, biscotti, muffins and more.

Classic Apple Pie

apple pie in the making

I’m not a pie baker. This is my first attempt. After making this pie, I have learned to go easy on Chinese 5 spice powder – it is very strong. I will go 1/2 tsp next time as the spice intensified after sitting over night.

The house smells delicious. I’m going to share the photo of the recipe from this book as I’m busy creating for the holidays.

beautiful book
page 1 of 2
Drain for 25 minutes. A bit of history on this colander, and measuring cup I’m using in the above picture. The colander is vintage – this was given to me 20 years ago by a sweet lady, Peggy. Peggy passed away in her 60’s from Alzheimer’s. She was too young to leave this world, and the healthiest person you could imagine. I helped take care of her because she was not only family, but a friend. She gave me this beautiful set of dishes. Every time I use this colander (often) I think of her, and I smile at the image of her face.

The measuring cup is antique and belonged to Jim’s grandma – she baked a lot. She was the pie baker in the family. I think of her when I use this cup.


Delicious! Granny Smith apples were the right choice

Blueberry Banana mini cheesecakes

Mini cheesecakes with banana cookie crust. Remember the banana cookie recipe I shared a day or so ago? I froze some of the dough from a batch I made 2 months ago because I wanted to see how they would turn out after freezing. I just baked them for this recipe. The cookies are delicious, and did not lose any flavor. They were the crust for these mini blueberry cheesecakes. (the author of the site I share for the cheesecake, uses vanilla wafers for the crust in the recipe) So easy – you can’t stop licking the beater -Jim just licked the spoon and said, “Oh my!”

These are very easy to create. I baked the cookies first, before adding them to the cups for this recipe. Here is where you can find the recipe for the cheesecakes:

https://bit.ly/2YyKWM2

I had everything in her recipe, except the wafers. I wanted to create it without going to the store for wafers only – so I pulled out some frozen cookie dough to use in place of. I wanted to share this idea for those who see a recipe and do not have all the ingredients – it’s an idea of how to make some recipes work for you.

Design a site like this with WordPress.com
Get started